Tuesday, 31 December 2013

Collection of props

During our Christmas holidays, we needed to collect and/or buy all of the necessary props that we need for our film opening, as well as film the chase scene. As a group, we got together and wrote a list of all of the props we had, and the ones that we needed to get. Below shows the list of items that were assigned to me to collect, all of which are mostly for the killers den, used for the death scene.

Props to get:


  • books on bookshelf 
  • "torture table" 
  • bowl for excess body material 
  • foetus in jar
  • Tools


  • Actors costume material to get:

    Victim
    • necklace - cross (to be ironic because she is a prostitute, contrasting with the Christian religion)
    Killer
    • trench coat
    • flat cap 

    Books on bookshelf


    This is the collection of books that I have selected to be used for our film opening, residing on the bookshelf within the killers den. The topics of books range from those on the human boy, medical books and books with titles that link to "killers".


    Torture table


    The table in the photograph to the left is what we will use for the "torture table" placing plastic sheeting on top of it, allowing us to smother it in blood from the wounds that will be applied to the victim.


    Bowl for excess body material

    To the left and right shows the bowel that will be used for the excess body materials that the killer takes out of the victims stomach when he is cutting into her.

    I chose this type of bowl as I feel that it has a plain metallic look, such that a surgeon might use- linking to the back story of our killer being an ex-surgeon.

    Foetus in jar


    For the foetus' in jars, I bought six separate jars at the pound store, filling them with water and colouring the water to look discoloured, taking inspiration from my research into foetus' in jars. I then attempted creating the foetus' themselves, however, this was much harder than I first thought.

    In the end, I was resolved to simply make the liquid less opaque and use oranges of which I manipulated to look more like the shape of foetus'.

    This didn't really turn out how I would have liked, but I didn't really know what to do. Putting the foetus jars into our killers den, however, along with candles illuminating the shelf, I feel that they look better than they could have. Photos of this can be shown above to the left and right.

    Cross necklace


    To the left you can see the cross necklace that I already had in my possession.

    Trench coat

    In regards to the trench coat, I had to borrow one of my Granddads coats, of which looks like the one shown to the right, that we could use. This, being quite large, will be slightly too big for our actor playing the killer, however, it will also make him look bigger and more disguised- adding to the killers intimidating appearance, emphasised with the scars on his forehead.

    Flat cap 


    To the right is a photo of the flat cap that will be used for our film opening. This will add to the killers appearance along with the trench coat.

    Tools

    Finally, the tools that we will use are shown to the right. They include all of the weirdest looking utensils that I could find, including a pizza cutter. The objects that I have collected also contain tools that I have found in my garage.

    As seen in the photo to the right, we will cover all of the tools and the bowl for excess body material in blood- adding to the gore, enhancing the conventions of the slasher genre.

    Monday, 30 December 2013

    Shooting Script:

    Shooting Script: Chase Scene

    Day: Thursday 2nd January 

    Meeting Location and Time:
    Raman's house = Annie, Hayley, Raman, Catherine = 1.30pm
    Franks Park = Jordan = 3.00pm

    Filming Time: 3 - 5pm

    Filming Location: Frank's Park, Belvedere

    People:
    Annie - Filming, Special Effects Make-up
    Hayley - Filming,
    Raman - Filming, Mise en Scene
    Jordan - Actor
    Catherine - Actor

    Costumes:
    Villain -
    Dark trench coat (Annie)
    Flat Cap (Annie)
    Glasses (Jordan)

    Victim -
    red dress (Raman)
    crucifix necklace (Annie),
    Gold heels (Catherine)

    Props:
    'dry ice' (Annie)
    Fake Stomach (Annie)
    Special Effects Make up (Annie)
    Torches (Annie)

    Equipment:
    Camera (Hayley)
    Tripod (Hayley)
    Stool (Hayley)
    Ladder (Raman)

    Outline of footage to be filmed:

    Different angles of girl running through woods before getting pushed against a tree by villain

    Saturday, 28 December 2013

    Final Mock ups of the Special Effects makeup that will be used

    Now that we are at the point where we have got our actors, we have finalised our storyboard, we've done a large amount of deconstructions into different aspects of our initial idea and we have tried out, revised and developed our practical ideas throughout the entirety of our coursework so far, we now need to tie up loose ends and start planning the days that we are going to film.

    But before we do this, a few other aspects of our filming process need to be trialed to see how they will turn out on camera, and whether they are a success, and if not, how we will need to adapt our plan to accommodate this obstacle.

    Below, you can see a documented investigation into the different special effects makeup that we have planned to have within our film opening. To ensure that each effect is done correctly- so that it looks realistic on camera-, I have also done a range of options for each effect so that we can choose what would be most appropriate for each scene.

    The special effects that we will be using:
    • Sfx makeup on the victim- running away from the killer
    • the fake pregnant belly before the killer has got his victim
    • the fake pregnant belly that has been ripped into by the killer
    • bloody masses that will be taken out of our victim- organs, intestines, umbilical cord, foetus etc
    • blood splatter on victim as cut into stomach
    • the "adore and endure me" scars/cuts on the killers skin
    • the killers hands

    Victims initial appearance when running away from killer


    To the left, right and below, you can see different experimental makeup pieces that I carried out, looking at what aspects to use during filming in our real film opening.

    Since our victim is going to be a prostitute, I have thought about the hair and makeup that she would have, but due to being chased by the killer, it has run, been smudged and is messy. This is shown in the photo to the left. I also added some liquid latex along the cheeks to symbolise tear streaks down her face, really creating the look that she

    I then did a separate investigation of different bruises, and cuts on the victim that would be present. These are shown below:


    Fake stomach

    Before:
    The victim, in the chase scene in the woods, will have to be shown as being pregnant. To do this, I needed to create a fake pregnant belly that was of a good quality, so that our actor can still run, without it falling apart.

    To do this, I used a You Tube video that I found, to help:


    After watching this, I found that I needed to get the following, to be able to make:
    • plastic straps
    • safety pins
    • scissors
    • plain white t-shirt
    • hot glue gun
    • a pillow
    The steps that I took to make the final fake stomach:


    1. I took the pillow, emptying it of just over half of its contents.


    2. I then took safety pins, shaping the pillow to look more like a stomach shape.


    3. Once I did this, I took a white t-shirt that I got from Primark, covering this initial shape, fixing it onto the pillow with hot glue.

    4. Taking just some string that I found in the cupboard, I strapped the fake stomach onto myself, to see if it gave the correct shape for a pregnant stomach.

    Below shows the final effect this gave:


    Apart from the bad quality photographs, I feel that this application will be perfect for our film opening. It is simple, but effective, and will be exactly what we need for the chase scene.


    After:
    I then had to create another fake pregnant belly, but this one is the one that will be shown after the killer has murdered his victim. Below shows a step by step record of how I did this:

    Bloody masses


    During the death scene, the killer will be shown to be taking different "bloody masses" out of his victims open stomach. To do this, I thought we could buy different organs from the supermarket, putting lots of fake blood on them, for the killer to then pull out of his victim, placing them in a bowl.

    Blood splatter


    Adore and endure me scars on the killers skin

    Another feature to do with our killer is that he will have "Adore & Endure Me" and "A&E" carved into his skin, on various different areas of his face and arms.

    For this investigation, I decided only to do one "scar", on my forehead- a difficult place to apply special effects makeup- as I didn't want to use up too much of my supplies.

    First I applied two layers of liquid latex as the base, spreading nose and scar wax on top to simulate the skin that is going to be manipulated.

    With the side of an object, I "carved" the words "ADORE + ENDURE ME" - I did the longer version as a compromise to only creating one scar- into the nose and scar wax.

    Filling in the carved words with  red and black coloring's, I added bruising with my bruise wheel, and applied the fake blood.

    Three different versions of the "scars" are shown below:


     I personally prefer the piece to the top right as it isn't so bloody that it looks really fresh, but it does look recent and quite shocking, which is what we want the audience to react to. Also, the one with the most blood reduces the visibility in the actual words that are carved into the forehead, which is not what we want, and the piece with the least blood shows off the irregularity in the skin smoothness of the forehead, showing the makeup too much for my liking. The piece in the middle is the best, and this is the one that I shall do for our final film opening sequence.


    Hands of killer

    I have already done a post on the investigation of what the killers hands will look like, but I never fully finalised it.

    Knowing, now, that the killer will be an ex-surgeon, and he will have gloves on quite a lot, to perform his murders, I decided to do another investigation, this time, taking this  information into account.

    For this investigation, I applied liquid latex onto my entire hand, leaving it to dry, and simply dabbing it with a white powder- giving the effect of dry/blistering skin. I wanted to represent the look your hands have after wearing gloves for an enormant amount of time, as if you have been in water for too long, and your hands become soft and wrinkly.

    To the left and above, you can see the final result, of which I was very pleased with and intend to use within our film opening.

    Friday, 27 December 2013

    Actor Scouting:

    Villain:


    For our villain we knew the type of guy we wanted but it was quite difficult to find anyone who would be willing to participate with our filming.

    Jordan (20)

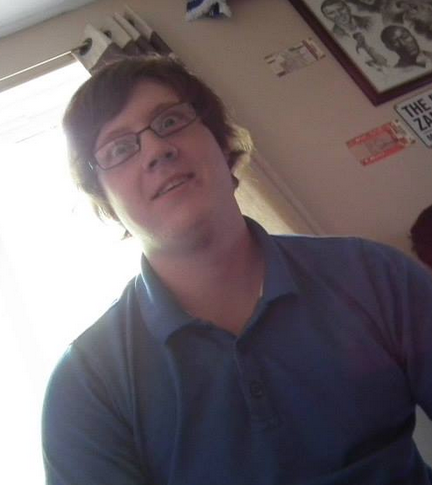
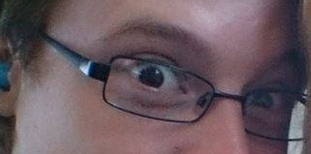
    He is around the appropriate age for our villain, and although he isn't that tall we can easily change the camera angles to make him appear taller. The main feature that is ideal for our villain are his eyes, he wears either glasses or contact lenses and they look creepy at times, which would be good if we decided to have an extreme close up shot of his eyes.


    Victim:

    For our victim, we want someone who looks particularly feminine and yet innocent and vulnerable. They also need to be available to film and if they are around our age, they could be busy with school work etc. All of our main choices are in our school year, which is a similar age to our villain, but we decided to go with Catherine as she is slim and has long hair which is a perfect fit for our character.

    Catherine (16)


     Emily (16)


     Kayleigh (16)


    Tuesday, 17 December 2013

    Production Company Project : Hayley

    Creating our own Production Company:

    As a group we had to think about creating our own production company and we decided that we would all create our own version and then see which one we liked best or include aspects of all three. As I wasn't happy with my previous examples, I decided to focus more on the typography of the lettering. I watched the YouTube video below on how to create the blood dripping effect and for the moment decided to place it onto a plain black background. After playing around with the different tools, I decided to change the aim so it was all twisted and creepy rather than the blood dropping.


    This is how the typography turned out, this could be effective for my idea if I decide to have the blood dripping down the whole of the screen, to reveal these letters.


    Continuing on with this simplistic idea, I added the picture to Photoshop  in the hope of adding a knife slashing sound effect. I decided the one below was simple enough and converted it into an MP3 format. I then added this into the project and made sure it was at the correct time.


    The video below is the clip complete with knife sound, but it is of a very low quality and can be improved greatly. If we manage to include the blood dripping down effect in our finished product I think it would look more professional.


    When using Adobe Illustrator to try out the dripping paint effect, I had a lot of trouble from the beginning, I couldn't seem to even find the simple circle tool but after a while and looking online at a lot of tutorials and help sites I managed to find my way around the program.

    Following the tutorial above, I managed to create some simple red 'paint' drips which I can edit to appear more like blood, by changing the colour, and the consistency. I am then hoping to edit the text onto it to make the idea for the production company.


    With the combination of mine, Raman's and Annie's ideas we are hoping to have the blood dripping down from the letters but maybe with the writing on the sink it could be effective.


    Friday, 13 December 2013

    Additional Ideas for Storyboard

    For the killer's diary, we have decided to use very formal, and fancy handwriting as seen in Anne Frank's diary, because it is adds to the old-fashioned theme of our project (which includes a record player and old music being played).

    Similar to Anne Frank's diary, we will have pictures of folklore foetuses and pregnant women, as mentioned in a previous post, to emphasise his obsessive nature to the audience.


    Also, I think that we should have an extreme close up of some book titles (idea of books from Annie's post) - we have a book called Fear is Key, and we could get some books about pregnancy, post-natal depression, operations, sedatives, women's health and so on. This close up will give the audience a greater insight into his obsession with women, so I feel that we should include this, even if it is for a split second.

    From our trip to Shoreditch, Annie and I went into a vintage store and saw a basket with women's purses in it and this gave us the inspiration to, perhaps, have a basket with all his victim's clothes in. If we were to have this, the clothes, shoes, purses and so on would serve as souvenirs of his victims which, again, highlights his fascination and obsession. This can be shown using a close ups so the audience can see the items properly.
    As well, in the middle of the room there is going to be a table so the victim is the centre of attention for the audience. The table is going to have plastic on it so the blood collects itself to make the death more gory and gruesome. From Annie's post, she included pictures of a victim on a cloth on a table, however we want to incorporate some of Dexter's room (in the same post) so we will use plastic instead of cloth.
    My group decided that the killer is going to wear a mask to cover his face which will have Adore & Endure carved into his forehead. In the chase scene he will be wearing a mask, then in the operation scene he will be wearing a doctor's mask and scrubs to tell the audience that he is a professional, but crazed and does not operate to save people, he does it to kill them. This is similar to an episode of Hannibal where a mentally unstable doctor operated on someone, taking out their organs one by one to see the minimum number of organs the victim can survive without.