Showing posts with label Evaluation. Show all posts

Thursday, 3 April 2014

First Draft Responses:

We were told to complete a first draft by the 28th March which would then be shown to other media students who would comment on it, saying what they thought worked well and what we needed to improve on.


After uploading this, we realised some of the sounds were at a different volume than what we wanted and the overall quality of the opening was reduced, therefore Annie edited the volume so it was all sounded how we expected it to be and re-uploaded.


What they liked: 


  • Most people got the fact that the genre was a horror/slasher and said that it was clear. 
  • The main feature that was mentioned was our mise en scene - the blood and gore etc, most people thought it looked really effective and as that was the main aspect of our opening, it was good to see that they thought it looked good.
  • The diegetic sound effects such as the squelching was effective.
  • There was a good range of shots, particularly the camera angles in the chase scene.
  • The jump cuts at the end worked well as the tension builds up.


What they thought could be improved on:


  • Some people had problems with the typography and the amount of time it remains on screen as they felt it flashes on and off too quickly, making it hard to read, in addition to this some weren't some if the "A + E" shown in the transition between the chase scene and death scene was effective.
  • Title at the end is too short, needs to remain on for longer so people get time to read it properly.
  • Adding more pace to the beginning shots (chase scene) especially the struggle, as some thought it should look more frantic.


What we're going to do:


  • We removed the "A + E" title in between the scenes as it was unnecessary and if people didn't think it worked it wasn't really worth trying to edit it. 
  • Extended the amount of time the forehead is shown at the end so it is easier to read. 
  • Edit the timing of the credits so they stay up for longer.


Music:


The non-diegetic music has always been a problem for us and this was highlighted in the comments, when we received contrasting feedback, with some saying it worked well and others saying it didn't fit the genre and was quite repetitive.
A few people said that the death scene music becomes too action-like at the end, however as it is one clip, if we were going to try and edit it, it would mean we would have to change the music for the whole death scene which would be quite difficult.
In my opinion, even if it doesn't fit the genre that well, I feel it works well as music for a film opening and helps reinforce that.
Most people seemed to think the chase scene music was okay, however that was the bit we weren't happy with ourselves so it's highly likely we're going to change it, if not then edit it so it sounds different.


Thursday, 27 March 2014

Evaluation of the Death Scene Non-Diegetic Sound

Having almost finished the final version of our film opening, I wanted to evaluate the non-diegetic sound that I created for the death scene.

Linking with the footage, I feel that, though the music is quite "action" themed, it adds tension and depth to the visuals in the clips of the gore that is shown. It's also a good way to get the viewer encased into the clips, the music being stimulating rather than too repetitive or boring making it appropriate for our film opening.

It also links to the target audience of 15 years and up, 15 being the age rating that we would give the film, as it relates to the type of music that people of that age range listen to. Rock music, of which it takes a lot of inspiration from, is the type of music that people in their late teens to early twenties can relate to, making it current and relevant to the viewers.

Being a slasher film, the non-diegetic sound of the most graphic scene within the film opening, the death scene, also needed to link to the preferences of the viewers, looking at the social groups that would like to watch this type of film genre- slasher. Being a low tone, techno-rock sound, the non-diegetic music also gives a feeling of intensity to the film opening, building up to a peak and then finishing off the extract nicely.

To conclude, the non-diegetic sound within the death scene, I feel, is very appropriate, linking to the footage, genre of the film opening, the target audience and the social groups that would watch a film of this genre.

Friday, 28 February 2014

Evaluation of Filming the Chase Scene

On Saturday 8th February, we filmed the chase scene under a bridge in Bexleyheath. We liked this area because it had this triangular construction < which we felt would be appropriate for the killer to corner the victim upon, and then strangle her. Filming this part went quickly and smoothly; Hayley filmed (she filmed and directed the whole of the chase scene) and Annie and I provided lighting.


When we were filming on the stairs, however, it was difficult to illuminate the actors without making them too bright, otherwise it would not have looked like the scene was at night. Annie and I had to keep the torches still because of some of the footage, we could see the light moving on the brick wall, so we had to re-do it.


These are the roads surrounding the tunnel which we filmed along. As it was tedious to keep moving out extra equipment, I stayed with it under the bridge while Annie and Hayley went down these roads to film.

The victim's make-up by Annie. This was very quick to do, it took about 5 minutes then we filmed the strangle part.
The killer's mask.
Hayley filming, Annie and I holding the torches.


Also, we filmed on the bridge, along the pavement which was easy to film because it was late in the evening and there were not many cars driving past.

We filmed a low-angle shot of the victim running along the bridge, with camera under the bridge. This was quite difficult to film because the railing on the bridge covered most of the actors, we were only able to see the top of their heads. To resolve this, we told the actors to stand closer to the railing so we could clearly see their heads as they ran.


Us watching through footage to see if we needed to make amendments.

During the filming process, it began to rain so I held an umbrella over the camera and Hayley.


Overall, the filming process of the chase scene went very well; better than the first attempt. Our actors' clothes and props were as my group wanted, and the location was good because we were able to utilise the stairs, bridge, under the bridge and side roads to create an effective chase scene.

Saturday, 15 February 2014

Evaluation of Filming - 2/2/14

When we first filmed the chase scene, there were a lot of aspects that we weren't happy with as mentioned in Annie's post.

When planning our second attempt at filming we took into consideration all of the aspects we wanted to change such as the location, time of filming and costumes.
 ~ We decided to film in Bexleyheath as it was a local urban area and would fit in with the storyline.
 ~ We aimed to film in the evening, when it was completely dark as the street lighting would be sufficient enough for our characters to show up clearly on screen. 
 ~ With our victim, we changed her outfit from the dress to the black skirt and red top but kept the bruise and her extreme makeup. We also decided against her wearing a fake stomach as it would be more obvious in the next scene that she was pregnant. 
 ~ We also didn't like the fact that we could see the villain's face and the outfit he was wearing so he would wear just casual dark clothing with a hood and a white mask.

How it turned out:

We had planned to meet in Bexleyheath, travel to my grandparents house to film the death scene and then back to Bexleyheath for the chase scene. 
The main problem was that one of actors had a family emergency, on the day of filming and so was unable to join us for the chase scene and the scenes in the garage. As we wanted to get a majority of the filming done on that day, I had to play the villain for the shots we had planned out. 


'Back-up villain'

Candles

Annie taking the candles shot 

Doing Emily's makeup

Annie's 'killer' hands

Raman setting up the camera 

Preparing to film

Fake tears

Raman filming

Annie filming
When looking at the footage from the day, I really wasn't happy with myself playing the villain as it didn't look right and would be much better if it were our preferred actor. Although I liked the location that we chose (the alleyway) it was extremely difficult to film in as the lighting was too dark for the camera to stay focused for a long amount of time.

This also meant that our villain didn't show up on the screen as well as we would have hoped. It was quite dark and blurry and I didn't think this would look good enough for our final coursework. Also with the location that we had chosen, we didn't realise how many people would be walking past on a Sunday evening which interrupted the shot a lot.

Here is a selection of screenshots from our footage, showing why I wasn't satisfied with the result.


While we were filming the chase scene, the camera ran out of battery due to the amount of times we had to film the different shots and this meant only part of the chase scene was filmed. Therefore as we would have to set another day for filming anyway and after looking at the footage, it would make sense to re-film the whole thing.

Wednesday, 29 January 2014

Evaluation of Special FX- Flashbacks

The special effects makeup pieces that I made for the flashbacks that we shot included:
  • The open stomach
  • Bloody wounds and bruises
During the preparation before shooting, when I was applying the open stomach to our victim, Raman recorded the creation process, of which I then edited and turned into a tutorial/overview of how I made this effect. This is shown in the video below: 


As you can see, most of the special effects pieces, only look really good, once the blood has been added to the made wound, however, I feel that this piece went really well.

Below, there are photos, in different angles and lighting, of the special effects makeup pieces that were applied to our victim.


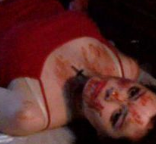
The photos on this row show the blood smeared all over the victims face, a few bruises and cuts on the skin in different places that she was hit.

I am reasonably pleased with this effect, however, I would have preferred the look of sprayed blood on her face, rather than smeared, to make it look more authentic. However, as a viewer, and as the flash back scenes only show for a few seconds, I wouldn't think this would be a large problem.


On this row, the photos show the blood covering the gloves of the killer as he is cutting into the victim, pulling different body materials out from her stomach.


I really like this effect, looking really gory and gruesome, with different bits of the prosthetic coming away from our victims stomach, adding to the effect. This specific effect went much better than expected.


To the left shows the stomach wound in the lighting that we filmed it in, with all the fake blood covering her arm and clothing also applied, adding to the gory aspect to these quick flash back shots.

I was overall, really pleased with this stomach wound application, providing the appropriate effect for what we wanted to portray in these flashback scenes.

 To the right, the flashback, looking at the blood dripping off of the victims hand can be seen, really portraying death, pain and murder, the blood looking fresh and realistic.

I am, again, really happy with the outcome of this, the blood looking the appropriate red colour, rather than becoming a pink, unrealistic colouring, producing this nice, gruesome effect.

Overall, I was very pleased with the special effects makeup in this flashback scene, the effects proving to look even better on camera, than the did in real life. I am pleased that I tried out and experimented with techniques before shooting, however, to be able to create these high quality pieces that are perfect to be able to put in our film opening.

Thursday, 23 January 2014

Mise en Scene of Killer's Den

In Hayley's shed, we placed candles on some of the shelves to add a romantic ambience which is ironic because he is going to kill her. cut her open and take her foetus. Also, the candles add additional lighting, but it was not a lot so we used other lighting to aid the filming process. We used a lamp because it had an orange undertone, adding to the ambience of the scene. 
 We placed plastic on the floor because, firstly it would help keep the floor clean from any fake blood, and secondly because our group is trying to emphasize the killer's obsession with death and gore. He is a doctor and likes everything to be neat and orderly. As well, we did this because we were inspired by Dexter's Room from a previous post. When we film the rest of the opening, we are going to put plastic on the garage door and along the walls, as seen in Dexter's room.
Also, we put black bin bags on the windows to block out any natural lighting, but some still came through which was beneficial so we could film and see what we were doing. However, these bags will not be shown in the film opening.
 In the room, the shelves still had all the garden tools and bags on them because we did not put any books or chairs by it as this section will not be shown in the flashbacks. However, when we film the second part of the opening, we will take off these items and put on health and pregnancy books and the foetus jars.
This is where the killer will sit and we are going to put a chair there. We are going to change the stickers on this small cabinet so it says things such as:
  • "nails"
  • "hair"
  • "teeth"
  • "fingers"
However, we will not make the killer open these drawers, it is only suggestive to make the audience squirm and to stress his obsession with human bodies.

Evaluation of Filming Flashbacks - 18/01/2014


On Saturday 18th January, we had planned to go to my grandparents house and use their garage as the location of our villain's hideout. We met at Bexleyheath as arranged around 1, where Annie and Raman had bought some extra things that we needed such as plastic to cover the table, candles and a red top. We already knew we were on quite a tight schedule due to the times that we were all available so we aimed to be done by 4.

We had chosen to change the actor we wanted to play our villain as we felt she looked too young and it didn't fit in with our storyline. As we also chose to completely disregard everything we had filmed over the Christmas holidays, it meant we had more choice with what happened in this scene.

Emily, our victim

For example, we realised it would be more appropriate for our victim to wear a top and a skirt rather than a dress as it would make is easier for the villain to get to her stomach. We kept in mind about how the colour red represents love and passion and decided to have her wear a red vest. Emily's dark hair is naturally wavy and she had already tied half of it into a ponytail so we decided to leave it like that and just mess it up a bit more.

Me doing Emily's hair

I then did her make up, aiming to make her eyes as dark as possible. I first applied eye-liner, eyeshadow and mascara before smudging it to make it look messy. I added blusher to her cheeks and used a combination of red lipstick and pink lip gloss for her lips.

Me doing Emily's make up

Annie then created the stomach wound which our villain would be making to get to the baby. She has evaluated this is her own post. (link)

Annie preparing to create the stomach wound

and again

Blood smears on Emily's arm

Side view of the stomach

Annie also used her special effects make up and fake blood to create a bruise and blood splatters on Emily's face. I felt this look was effective and suited the character well.

Creating a bruise

Adding the fake blood

Not much of the villain is shown so we didn't need our actor to be present so Annie put on the purple surgical gloves for some of the angles we used where the villains hands were in shot.

Annie wearing the villain's gloves

For the lighting in the garage, we decided to use my grandmother's lamp as it cast an orange light which was better than the bright white light from the torches, although we used them occasionally to create an even brighter light.

Raman holding the lamp

Raman holding the torches


We also used black bin-liners to eliminate the natural light coming from the window as it created a more gloomier atmosphere.

Raman and Hayley sorting out lighting

Blacked out windows

We also lit numerous candles and put them on the shelves in the corner, the next time we film with added mise en scene we are hoping to put more of them around the garage as they looked interesting and added another light source as it made it more creepier.

Raman lighting candles
Candles 

I felt the mise en scene that we added to the garage was appropriate as the shots we were taking on that particular day would not show that much of the room. We just added a plastic covering to the table and floor as we felt our villain would want to be clean with his murders and would use it to protect the blood splattering everywhere.


Plastic covering the floor and table

The main problem was the timing, as we only really had a few hours to get everything set up and filmed and we knew it would be tough but I thought we did quite well considering the amount of make up we had to put on our actor and the mise en scene in the room that was needed.
Another major problem was that the camera ran out of battery half way through filming, but luckily we overcame this by realising we were able to film while the camera was plugged in charging, although it made it slightly more difficult. Often the camera would take a while to focus, due to the lighting and this ended up wasting more time than we would have wanted.

However, I do feel this filming session was a lot more successful than the first and hopefully the footage we have will be okay to use for the real film opening.