Showing posts with label Death Scene. Show all posts

Monday, 31 March 2014

More Editing of the Death Scene Footage

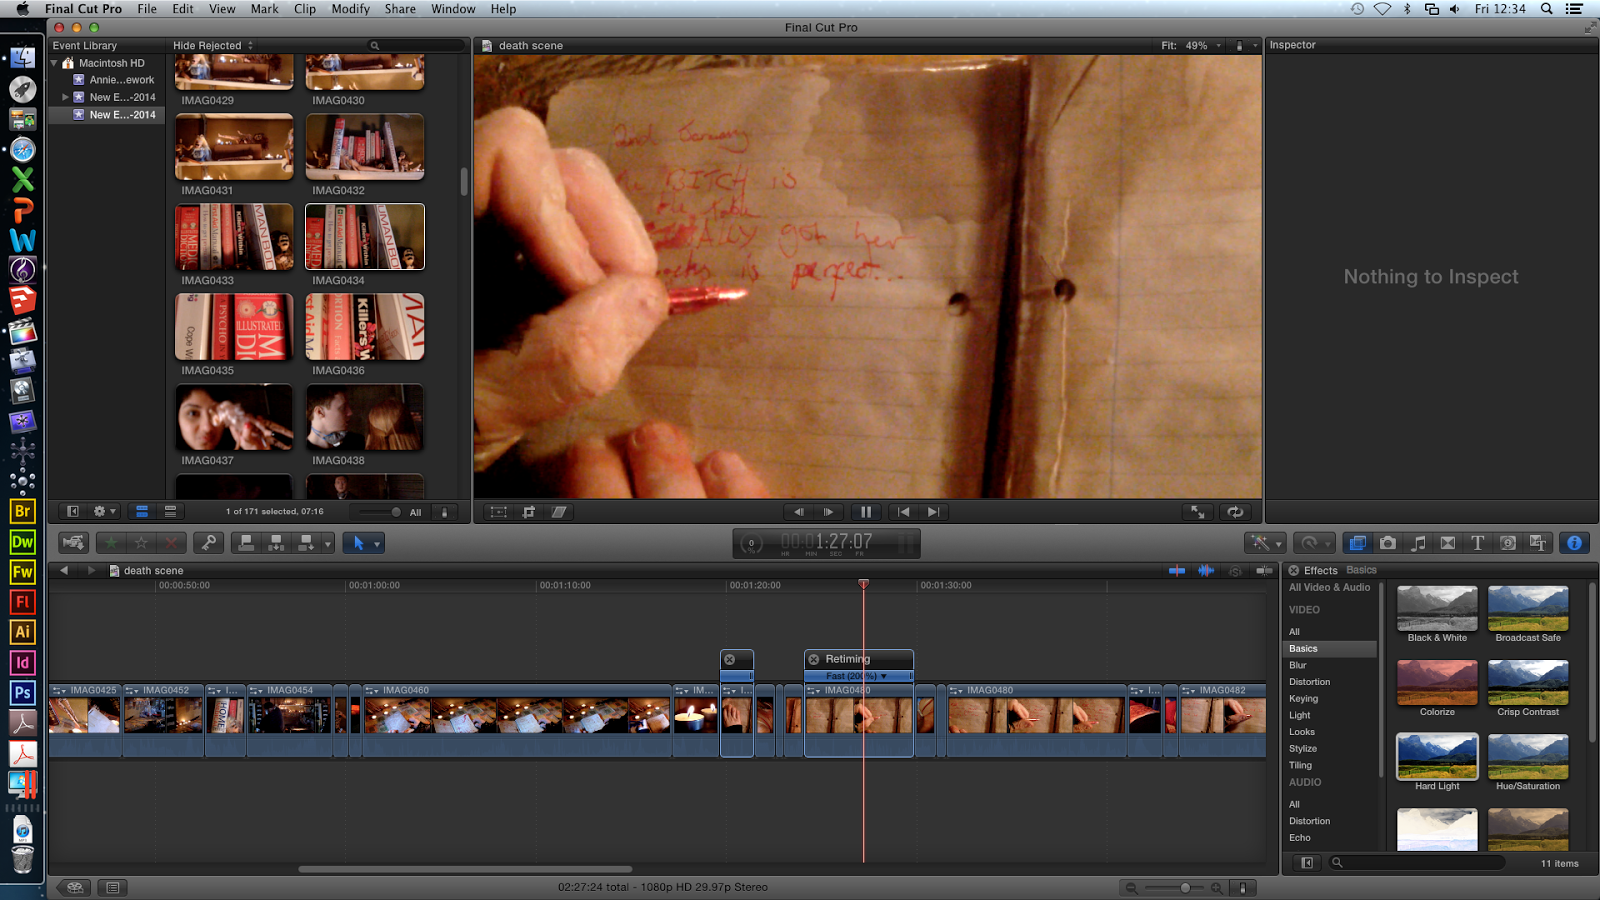
As my targeted scene to edit is the death scene, I carried on with my editing of the footage in this scene, as shown in the evidence below:

In this session, my tasks were to cut down the extract so that it fit our two minuet time allowance. I also needed to perfect the editing to make it effective.


First ,  I started re-timing the shots where killer turns around, making them slower to add to the sudden contrast in the change of quick paced editing to the slow pace of this shot. This, although adding to the overall time, would add to the effectiveness of the footage.


I also added a black screen for the ending image, rather than just ending the opening scene on the killers forehead- making it look more professional.


Next, I went though the footage, speeding up and cutting shots, so that I could get the video to two minuets long, rather than the two minuets fifty seconds that it currently was. 


As I kept watching the last collection of shots, I decided that they needed flash backs between cuts of the killer turning around as the impact of the slow-motion got lost through the length of time it took the killer turning around. Adding quick flash backs in between cuts of this shot would not only build tension but also add to the dark and twisted feeling the footage gives off.


As a result of added the flash backs, I needed to go through the footage again, cutting off any un-necessary seconds.

Talking as a group, we felt that a problem that would be found within the comments of our first draft saying that the death scene is confusing because of all of the flash backs. Taking initiative to try and fix this possible problem, I decided to experiment with the effects that I could add to the flash backs to make it more obvious that they are, in fact, flash backs. Below shows my investigation:


Here, I have added the effect "Radial" as a transition into the flash back- the blur effect used to signify that its part of the killers memory. My idea with this is that as the extract is played, the flash backs would start off really blurry and get clearer and clearer- symbolising the fact that the killer is re-living the murder, it becoming more present than a memory.

I tried this idea out on a few of the flash backs with a few different types of "blur" effects that were available to me, but because of the length of them, it really didn't work (shown above). It  gave the viewer too much to look at and comprehend with such a small amount of time, and it also reduced the "shock" of the initial gore within the death scene.

I decided to leave the flash backs the way that they were, acting on changing them if necessary when we get feedback on our up-coming initial draft of our film opening.

Thursday, 27 March 2014

Evaluation of the Death Scene Non-Diegetic Sound

Having almost finished the final version of our film opening, I wanted to evaluate the non-diegetic sound that I created for the death scene.

Linking with the footage, I feel that, though the music is quite "action" themed, it adds tension and depth to the visuals in the clips of the gore that is shown. It's also a good way to get the viewer encased into the clips, the music being stimulating rather than too repetitive or boring making it appropriate for our film opening.

It also links to the target audience of 15 years and up, 15 being the age rating that we would give the film, as it relates to the type of music that people of that age range listen to. Rock music, of which it takes a lot of inspiration from, is the type of music that people in their late teens to early twenties can relate to, making it current and relevant to the viewers.

Being a slasher film, the non-diegetic sound of the most graphic scene within the film opening, the death scene, also needed to link to the preferences of the viewers, looking at the social groups that would like to watch this type of film genre- slasher. Being a low tone, techno-rock sound, the non-diegetic music also gives a feeling of intensity to the film opening, building up to a peak and then finishing off the extract nicely.

To conclude, the non-diegetic sound within the death scene, I feel, is very appropriate, linking to the footage, genre of the film opening, the target audience and the social groups that would watch a film of this genre.

Fixing the sound for our Friday 28th March first draft deadline

Being that our deadline for our initial draft of the film opening is Friday 28th, I felt it prudent to fix, to the extent of my ability, the audio. Below shows the screen shots of what I did, with in-depth annotation explanation.


First of all, I took the audio that I had made for the death scene, disabling it, so that it wasn't deleted, but I could add a new non-diegetic sound instead. I also added the soundtrack that Hayley and I found on YouTube onto the footage- Tension Building Sound Track 3.


At the point in the footage where it goes from really fast pace editing to a continuous shot, I cut the sound, adding a quieter, more calm sound finishing off the scene and the film opening. This, I did to link to the building in intensity of the visuals in the footage, then the peak and  then the after wave- ending the extract.


I then started looking at the transition from the chase scenes non-diegetic sound to the death scenes. This, I unfortunately was able to do little to make better, rendering the chase scenes sound to be cut off just before the final few shots. This will be something that we will have to fix, but will not be able to do before the Friday deadline.


I then decided to keep my idea of the diegetic sounds accompanying the non-diegetic music, and so, I applied the appropriate sound effects, that I had collected for my home-made audio, to the places that needed them- adding a more realistic effect and depth to the audio of the death scene. This took quite a long time applying the correct sounds into the correct places, and then making sure that they sound appropriate, adding layers of sounds to ensure the desired effect was created.


As a final addition, I decided to add a under-sound to the chase scene of a single not getting more and more intense. This, accompanied with the chase scene non-diegetic sound that is currently in place, works well to build up tension within the scene, linking the audio more with the slasher genre.


Above is a screen shot of all of the audio, and the footage that is currently in place, ready for the Friday deadline where it will be put on YouTube for comments to be made for the initial draft.

The only things that I'm not really happy about with the audio, but am not able to change before Friday, is at the end of the chase scene, the non-diegetic sound  needs an ending note to be recorded of which hasn't been recorded, and so, the audio just cuts off. We will need to fix this as soon as possible.

Friday, 7 March 2014

Editing the Death Scene and Flashbacks


Now that we had all of the footage for the death scene, I could finally start editing the footage, incorporating the flashbacks that we have already edited into the scene. Below shows the first stages of editing the death scene and flashbacks:


Firstly, I muted the volume on every clip so that the non-diegetic music and diegetic sounds that will be layered over the top will not be interfered with by the audio recorded when filming each clip.


I then went through the footage, cutting each clip down using the trimming tool and the blade. For the longer clip of the killer writing in the diary, I used the blade tool, cutting it up and deleting unnecessary seconds- trying to reduce the clip down to around one minuet, of which the death scene will need to last to meet the two minuet limit on the entire film opening.


Going through all of the footage again, I decided to use the re-timing tool to speed up different sections, again reducing the time of the death scene and making the footage more visually stimulating to the viewer- not getting boring.


At this point, I decided to apply the flash backs, that I had already edited, into the footage of the death scene in the appropriate places.

Taking each one, I placed them between each shot within the death scene, starting with a slow pace editing changing in shot. Through the extract, I started increasing the pace in the editing, reducing the length of each of the shots, building up a collection of flash backs that get more and more frantic until the climax at the end of the sequence where a singular shot of the killers forehead is shown in a much longer shot. This process of editing, I have done, to increase the tension within the scene and make it more intense for the viewer through the use of editing, the visuals within the shots- gore- and then later on the sound will also play a part in this effect.


As the extract wasn't nearly one minuet yet, again, I went back through the sequence, cutting the clips again to rid any un-needed seconds, and changing speeds of specific shots, all to reduce the overall time and make sure that the footage would keep the viewers attention and not get tedious.


The overall editing process being a time consuming task, I did have to repeat myself by going through the clips, cutting them to smaller time frames, and then fixing the pace of the edits, making sure the increase in  intensity was kept present and didn't get lost in the process of cutting down each clip.

This being my fist session of editing the death scene, I am pleased with the way it has gone, having a clear idea of what my group and I want the footage that we have recorded to look like as a final product. I just need to keep this process up, sorting out the audio etc for it to be, finally, complete.

Thursday, 13 February 2014

Storyboard for the Death Scene

This is the storyboard that I created for the Death Scene within our film opening. The "z" lines between the shots planned are where I intend to add the "flashbacks" that we have already shot.

The Death Scene should last for a duration of around a minuet and a bit, meaning that it will take up most of the film opening, meaning that it is a vital part within our filming process to get correct. This is why it is so important to get the plan of this scene correct and organised  for the day of shooting to go smoothly and with minimal problems. This will be reducing, also, our possible need to re-shoot, of which we have already had to do a few times.


Thursday, 6 February 2014

Shooting Script for Death Scene

Date: Sunday 9th February

Time: 11 - 4pm

Location: The shed

People:
  • Annie - filming / special fx make-up / props
  • Hayley - filming
  • Raman - filming / directing / props
  • Emily - actor
  • Jordan - actor
Costumes:
  • Killer - dark trousers, scrubs top, long-sleeved top underneath, doctor's mask
  • Victim - Red top, coat, black skirt & black tights
Props:
  • Maggots (Annie)
  • Diary (Annie)
  • Scrubs & Tools (Annie)
  • Foetus Jars (Annie)
  • Dolls (Raman)
  • Books (Annie & Hayley)
  • Candles & Plastic (Raman)
  • Pictures of victims (Raman)

Equipment:
  • Tripod & Camera (Hayley)
  • Second Camera (Raman)
  • Torches (Annie)
Plot:
 Killer has cut open victim & is going through his diary

Thursday, 23 January 2014

Mise en Scene of Killer's Den

In Hayley's shed, we placed candles on some of the shelves to add a romantic ambience which is ironic because he is going to kill her. cut her open and take her foetus. Also, the candles add additional lighting, but it was not a lot so we used other lighting to aid the filming process. We used a lamp because it had an orange undertone, adding to the ambience of the scene. 
 We placed plastic on the floor because, firstly it would help keep the floor clean from any fake blood, and secondly because our group is trying to emphasize the killer's obsession with death and gore. He is a doctor and likes everything to be neat and orderly. As well, we did this because we were inspired by Dexter's Room from a previous post. When we film the rest of the opening, we are going to put plastic on the garage door and along the walls, as seen in Dexter's room.
Also, we put black bin bags on the windows to block out any natural lighting, but some still came through which was beneficial so we could film and see what we were doing. However, these bags will not be shown in the film opening.
 In the room, the shelves still had all the garden tools and bags on them because we did not put any books or chairs by it as this section will not be shown in the flashbacks. However, when we film the second part of the opening, we will take off these items and put on health and pregnancy books and the foetus jars.
This is where the killer will sit and we are going to put a chair there. We are going to change the stickers on this small cabinet so it says things such as:
  • "nails"
  • "hair"
  • "teeth"
  • "fingers"
However, we will not make the killer open these drawers, it is only suggestive to make the audience squirm and to stress his obsession with human bodies.

Thursday, 12 December 2013

Deconstruction: Non-Diegetic Sounds

Deconstruction of Non-Diegetic Sounds:

As we are still undecided whether we are including an actual violent death scene I decided to look into the different music and sounds heard during a death scene. This should hopefully give us an idea of what types of music and/or sounds we should have if we decide to include a death scene.


One of the most recognisable sounds from a horror film, the scary horror music from Psycho is extremely well-known as it automatically makes any scene so much more scarier. The fast paced beats make the audience think of a countdown, leading up to something which would appear to be a death. The change in pitch also adds to this and the weird scraping knife sound that the instruments create is really effective. The low paced 'humming' sounds which interrupt the shrill beats also provide variation so the music isn't the same all the way through.


In this scene from The Texas Chainsaw Massacre: The Beginning, the dialogue and the diegetic sound of the chainsaw are probably more dominant but I am focusing on the music in the background as I feel without it, the death would not be as effective.
During the first 20 seconds or so, the audience should be listening to the dialogue but there is some slow background music which is very consistent at the same speed and volume, almost luring the audience into a false sense of security while at the same time making sure they are conscious of the situation at hand. This builds up slightly, making the audience think something big is going to happen but it's kind of a red herring as the characters change.
Almost immediately though, the music increases, even louder than before and the quicker tempo and the added drum beats make it sound more impatient and builds up to the moment where Leatherface appears. The combination of a deep rumbling noise and a higher pitched note used also add a sinister, eerie feel to the situation and help to increase the tension even more.
Throughout the next moments the music stops, there are drum beats but they are quieter than before, however the music increases again quickly as the action in the scene becomes more intense. The sound of the chainsaw then overpowers the music, showing how impressive and deadly it is and to make the audience focus on the weapon itself.
The simple drum beats return slightly louder and then the stringed instruments also join in towards the end of the clip, to stop the scene from being silent with just the man talking. The non-diegetic sound during this sequence is very effective as it is creepy and adds tension to the scene as the music seems to fit the action perfectly.


In another clip from Texas Chainsaw Massacre, there is a lot of screaming from the girl but the sound effects in the background can still be heard. From the very beginning we can hear low pitched bass notes almost once every second, as the girl tries to run away, but then as he catches her and picks her up, a high pitched ticking noise joins in almost to signify she can't escape now.
The bass notes are still playing but the tempo has become much more fast paced and urgent. Gradually the sound of stringed instruments, possibly violins, builds up to increase the tension and also the desperation in her screams. The whirring of the chainsaw then joins in with the music, obviously telling the audience what is about to happen and the steady rhythm of the ticking helps make the scene more scary for the audience.


I decided to mention the song below which is also from The Texas Chainsaw Massacre, as it is completely different from what you would expect from a trailer for a horror movie. This extremely subverts the conventions of trailer music as you would not expect a film like TTCM to use a song like this to promote the film, however it is still one of the most well-known horror films around.


During my research, I also decided to look at horror music that other people had done themselves to see how simple it would be if we were to do it ourselves from scratch. I liked the use of the piano in this one for example, it sounds good especially with the deep notes in the background and the held notes (possibly strings). I also liked the big drum beat at the end as I think it's best to finish on a loud note rather than just fading out unless you want it to be creepy and feel it would worth with the scene. To me however, it didn't sound that scary, I think it wasn't either fast or slow enough, it was kind of in the middle and just sounded to me like it was sad music and I could picture it being in a tragedy film, rather than a scary horror film.


During my investigation, I found that the piano and also a lot of stringed instruments were mostly used to create tension, that is why I feel that in our opening, it could be more effective if we decided to use those instruments if we choose to have music as it builds up the atmosphere to that final moment where usually a death or something important happens. As we don't have any experts in music in our group, we would either have to get help from a friend or try to keep it relatively simple, but still scary.


Friday, 15 November 2013

Planing the Deaths Scenes AND Evaluation of Death Scene Trial

After the death scene trial, I realised that I, along with my group, have a few extra things that we need to plan and decide before we make the official shots and clips that might go in our film opening.

First of all, we needed to decide how the the victims would be killed. The aspects that we have taken from the idea of the victim being pregnant, I have put into a list, shown below, of how he could kill his victims:
  • while the foetus is being carved out of their torso, leading to them bleeding to death
  • by being strangled
  • by beheading them
  • by strangling them with the umbilical cord
Some of these ideas link to previous research that we have all done. The foetus being taken out of the torso links to the deconstruction of Creep and how the killer carved out the foetus' of the women that he victimised and the beheading idea links to the Shordtch location research where we saw a model head placed on a spike portrayed on top of a wall.

Se7en

Another aspect that we had to decide is when the killer would take these photos of his murders. I decided to look at a film that uses the idea of the killer taking pictures of his victims too, and ended up deconstructing Se7en.
When looking at the Se7en, I saw that the killer took a series of photos of one of his victims that he tied to a bed for just over a year, taking photos after set periods of time to see the victims deterioration through the year. A few screen grabs are shown below:

To the left shows the first photo taken of the man at the beginning of the year looking normal.

To the right shows the photo taken of the man near the end of the year that he was tied up looking as if he is decaying while still alive- a rather grotesque look.

This idea, although a good one, wouldn't really fit with out theme of killing, but taking the idea of the before and after stages of his victims, having a photo of his victims in their day to day lives- "stalker photos"- and a photo of his victims as they have died on his torture table.

Special FX

After taking this into account, I decided that it would be best, for our film opening, if we just got our killer to take photos of his victims after they have been killed, having the idea of the "stalker photos" within the theoretical "rest of the movie" that we will not be making.

When these photographs would be taken is closely linked to where they will be taken. As a group, we decided that the killer would take the photo after his victim is dead- lying on his "torture table".

Taking all of the research and planning that I have completed into account, I decided to do a special effects makeup investigation into the way the victims would be displayed:

First of all, I made an umbilical cord. One that we could use to "strangle" the victims of the killer.

 To make this, I used scrunched up tissue paper, PVA glue, acrylic paint that was watered down and cling film to add the shiny, slim on the cord.

Once I had made this, i then used my neck as a model, and added bruising, with my bruising wheel, to show the special effects makeup that I would use on our victims to symbolise strangulation via the umbilical cord.


I also made a prosthetic stomach out of paper mache, nose and scar wax, the bruise wheel and fake blood.

Step by step, I covered a balloon in paper mache with two layers. This would give enough strength for the stomach to stay rounded.

I then popped the balloon and cut the excess paper mache from the bottom, creating a neat edge.
I turned up the sides of the edges so that it would be easier to apply to the stomach.

After drawing where I would cut the fake stomach so that it looked as if it had been torn open, I made the fake wound, peeling the material back.

 Next, I  added cotton wool to the inside of the peeled back "skin" to show the muscle and tissue that would be there, along with the insides of the stomach. This was to symbolise the organs and tissues within the carved out stomach. I then painted them with red, brown and yellow tones to create a flesh effect.

Adding the fake blood was the last effect. I was originally planning on applying this prosthetic to myself, but I found that it was way too difficult to do it to myself, worrying about all of the dripping blood and getting everything stuck down properly at the angle that I was in.

The finished piece is quite good, and I think that if we use this effect in our film opening, it would be a success.

I then just experimented with cuts and bruises on different parts of my body that we could add to show the struggle before the victim got on the torture table.

To the left shows a graze  using thick "scab" blood and the bruise wheel to add colour and obviously bruising.

This investigation has allowed me to test out my ideas and also get more of a plan together, collating and developing them to get an appropriate representation of the slasher genre within this very important aspect of mise en scene that will play a large part within the film opening.

Monday, 4 November 2013

Death Scene Number One- Trial

For my practical investigation this week, I have decided to do one of the death scenes that will be shown in the film opening as a photo in the diary and/or a small clip- as if a memory.

However, during the half term that I had to do this, I could not find any willing participants to be the model for this scene as it was inconvenient for them to come over at one time, or they were busy doing other things. In the end, I had to do it as a last minuet thing with my sister, who was not very willing, but agreed to help me out. This was quite worrying to me, being that if someone couldn't give up an hour or two of their time, how would we get a few people to do the whole film opening. This is an issue that we will have to address soon.

So on the day before we went back to school, I attempted to create this scene:

The location of this death scene is an alleyway next to my house, at around 5 pm. The location is shown in the pictures to the left and right, and as shown, I experimented with the lighting before hand to get an idea of what type of lighting would be appropriate.


To the left you can see the motion sensor light from the garage, giving off a visible beam towards the ground in front of the building. This could be where the body is shown.
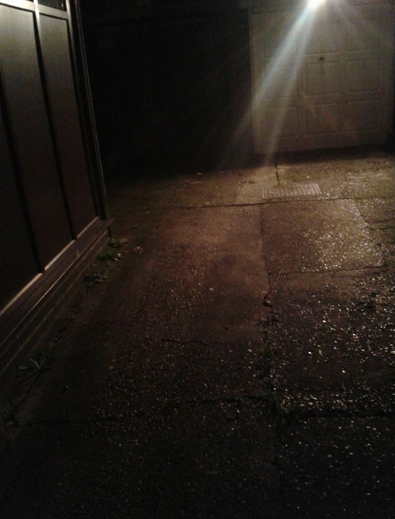
To the right is the same alleyway, but with the main light not working and a pale light shining towards garage. This low- key lighting gives an eerie effects, adding tension to the image.

To the left is another low-key lighting effect, however, the camera is angled towards the garage, coming from the wall, as if its in the view of someone who is hiding- possibly in the killers point of view.

The final photo to the right shows an even darker lighting, illuminating only a small section, making the image go into darkness- adding to the tension and the fear of the unknown.

After putting the special effects makeup on my model, I positioned her on the floor of the alleyway, as if she had been attacked and murdered- her throat slashed. Below shows the shots of this scene:

 To the left and right shows my model at a close up shot with her throat slit and blood on her shirt, with bruises on her face, and dirt on her all over her- as if she had been in a struggle, restrained and murdered.
The lighting is quite high-key, illuminating the face- the photographs would be more appropriate as police shots of a victim than the killers shots of his work, or a memory- not wanting to be caught, and more subtle when killing the victim.

The photograph to the left has more appropriate mise en scene, being that the victims eyes are closed, the blood is illuminated against the light shirt, and the lighting is more low-key, for the killers memory, or is photograph of his victim.

The final photo above shows my victim from further away, the light from the motion sensor light streaming down on her. It is, however a photo that would not be taken by the killer- or be in his memory of his victim, as the mise en scene isn't quite right.

The finished result of this first death scene for our killers diary turned out to be okay, however, I do feel that we need to do it again, using this as a trial death scene and an example of what obstacles we will have to avoid or overcome. I will be doing another post, planning the death scenes that we are going to create- where they will be located, the way the killer will kill his victim and the type of person that our killer is going to be focusing on.