At this point in editing, all we needed to do is perfect the audio and do some minor touch ups to the footage. However, as a group, we decided that the ideas for our audio that we have had so far don't really work. For the chase scene, the music created is too classical to fit with the "slasher" genre, and for the death scene, what I have made sounds too much like Se7en's opening title sound.
Going on an intensive research session in our media lesson, we came across four sounds, on YouTube, that worked better with our footage that what we have currently. Below shows the sounds that we found, with annotation on what we are thinking of doing with it:
We liked this sound track initially for the chase scene having the strong beats of which we could link with the editing- changing in shots.
However, on further research, we came to prefer this sound for the chase scene, it sounding more "scary" than the previous one. It also has this intensifying sound at the end of the extract, that would link really nicely to the struggle between the killer and the victim at the end of the chase scene.
Starting at 1:18, we found this sound track that we felt would work really well for the death scene- with the diegetic sounds that Annie has planned to incorporate playing over the top in the appropriate places. It adds suspense, brings more of an atmosphere to the footage, and links nicely with the intense and gory footage.
To be on the safe side, however, we decided to carry on our research to find one alternative soundtrack that we could take inspiration from to go along with the death scene footage. We chose the sound shown above as it would be good as background non-diegetic sound if putting more focus on diegetic sounds that would play along side it.
To conclude this post, we now have more of an idea of what to do for the audio of our film opening. Its just a case of manipulating the sounds at our disposal and creating an audio that is of top quality.

Anastasia Kemp: 8108 Hayley Louise Tibbs: 8394 Raman Gill: 8072
Showing posts with label Investigation. Show all posts
Showing posts with label Investigation. Show all posts
Tuesday, 25 March 2014

Wednesday, 1 January 2014
Fog effect
For our chase scene, I thought that it would be a great idea to add a smoky effect to our shots, making it add to the tension and create an atmosphere within the scene. It would also add to the idea that we want the initial scene to look as if the victim is lost, and constantly running from her attacker, as if in a drugged state.
To find out how to create this effect, I immediately thought of dry ice, but I felt it necessary to research into it before going ahead and buying dry ice, to see if there were alternative methods. In this search, I found a website that explained about a method of creating steam "fog" with only water and ice.
Below shows the video that I took as I tried this method out:
As said in the video, this technique to make fog wasn't very successful, and so, my initial idea of the dry ice came into light again. I now just needed to get some, and find out how to use it.
Researching, I discovered that all you had to do to make the fog effect with dry ice is to get dry ice pellets or blocks and put almost boiling water onto it, initiating the fog reaction. A good You Tube video that I found, creating this effect is shown in the video below:
 The cheapest dry ice pellets/ blocks that I found were rather expensive however, priced at £27.60 for only 2.5 kg. This, with the amount of money that my group and I were willing to spend on props and equipment for this project, was too great, so I decided to look into more alternative methods of creating fog effects.
I found one other way to make fog- with "fog fluid" and a fog machine. But again, a fog machine would cost far too much money for what we were willing to spend. With this obstetrical in mind, I looked for a tutorial into how to make a fog machine. The best tutorial that I found is shown below:
This idea, however good, firstly doesn't produce enough fog to be able to give the atmospheric effect that I wanted, nor is it robust enough to be able to work with it on a windy, possibly rainy, evening within a wooded area, so this idea was written off also.
When I had finally decided that we were going to have to forget about the fog idea, because of all the problems that we would face with how to heat the fog fluid to produce the desired effect, I posted a "help" post on Facebook to see if anyone had a fog machine that we could borrow, or any cheep dry ice suppliers. Within five minuets, my grandad phoned me and explained he had a fog machine that we could borrow and a generator to give it power! This was amazing, and I went round to their house immediately to get the machine, to see how good it would be for our needs- filling a pathway in a wooded area with fog.
However, when I got to their house, I found that because the equipment was so expensive, and we were going to a wooded area when it was getting dark, I didn't feel comfortable with taking this type of stuff with us into our location. This, however disappointing, wasn't a complete waste of time as the effect would have been really good if we had been able to do it, it is just because of resources as we are not a professional company creating a movie with a large budget.
Overall, I am pleased that I investigated this, as it would have been an amazing feature within our film opening, but we are unable to get this effect. Being that our filming of the chase scene is tomorrow now, the mise en scene, makeup and story line should be good enough to for the result that we want to produce for this chase scene.
To find out how to create this effect, I immediately thought of dry ice, but I felt it necessary to research into it before going ahead and buying dry ice, to see if there were alternative methods. In this search, I found a website that explained about a method of creating steam "fog" with only water and ice.
Below shows the video that I took as I tried this method out:
As said in the video, this technique to make fog wasn't very successful, and so, my initial idea of the dry ice came into light again. I now just needed to get some, and find out how to use it.
Researching, I discovered that all you had to do to make the fog effect with dry ice is to get dry ice pellets or blocks and put almost boiling water onto it, initiating the fog reaction. A good You Tube video that I found, creating this effect is shown in the video below:
The cheapest dry ice pellets/ blocks that I found were rather expensive however, priced at £27.60 for only 2.5 kg. This, with the amount of money that my group and I were willing to spend on props and equipment for this project, was too great, so I decided to look into more alternative methods of creating fog effects.I found one other way to make fog- with "fog fluid" and a fog machine. But again, a fog machine would cost far too much money for what we were willing to spend. With this obstetrical in mind, I looked for a tutorial into how to make a fog machine. The best tutorial that I found is shown below:
This idea, however good, firstly doesn't produce enough fog to be able to give the atmospheric effect that I wanted, nor is it robust enough to be able to work with it on a windy, possibly rainy, evening within a wooded area, so this idea was written off also.
When I had finally decided that we were going to have to forget about the fog idea, because of all the problems that we would face with how to heat the fog fluid to produce the desired effect, I posted a "help" post on Facebook to see if anyone had a fog machine that we could borrow, or any cheep dry ice suppliers. Within five minuets, my grandad phoned me and explained he had a fog machine that we could borrow and a generator to give it power! This was amazing, and I went round to their house immediately to get the machine, to see how good it would be for our needs- filling a pathway in a wooded area with fog.
However, when I got to their house, I found that because the equipment was so expensive, and we were going to a wooded area when it was getting dark, I didn't feel comfortable with taking this type of stuff with us into our location. This, however disappointing, wasn't a complete waste of time as the effect would have been really good if we had been able to do it, it is just because of resources as we are not a professional company creating a movie with a large budget.
Overall, I am pleased that I investigated this, as it would have been an amazing feature within our film opening, but we are unable to get this effect. Being that our filming of the chase scene is tomorrow now, the mise en scene, makeup and story line should be good enough to for the result that we want to produce for this chase scene.
Thursday, 28 November 2013
Practical Investigation of Graphic Sounds
I tried making squelching sounds, as mentioned in the previous post, and did this by moving mushy food: This can be used when the killer is trying to take out the foetus because it will make the scene more realistic. Also, like many slasher films, it will make the death scene nauseating because operations usually make people feel that way.
Next, I tried making a knife slashing sound and did this by simply taking the knife out of the knife holder:
The knife sound will be used in our opening when the killer has just picked up the knife, ready to cut open the victim. This will frighten the audience as it will tell them that the killer is about to hurt the victim in an abhorrent way.
When the knife it cutting the victim, the killer could do it in a harsh and heartless way, to emphasize his impulsive need for women and their foetuses.
In our opening, we could include the sound of bones breaking, for example before she is falling into unconsciousness, there could be the off-screen sound of bones breaking, then her eyes could close. This will terrify and sicken the audience and make the victim seem more vulnerable and the killer more powerful.
When the killer has cut open the victim, there can be on-screen squelching noises and then the sound of blood trickling out of the body. As in Haunting In Connecticut's opening, there is the diegetic on-screen sound of blood trickling out of a tube which the killer has attached to the victim's wound. We will have the sound of blood dripping in our opening to go alongside the victim's wound and to display the slasher convention of having a lot of gore.
Overall, in our opening, we will include knife slashing noises to tell the audience that the killer has just cut open the victim, then there will be squelching noises to show that he is trying to take out the foetus. These noises will make the audience feel queasy which is the aim with slasher films.
The knife sound will be used in our opening when the killer has just picked up the knife, ready to cut open the victim. This will frighten the audience as it will tell them that the killer is about to hurt the victim in an abhorrent way.
Overall, in our opening, we will include knife slashing noises to tell the audience that the killer has just cut open the victim, then there will be squelching noises to show that he is trying to take out the foetus. These noises will make the audience feel queasy which is the aim with slasher films.
Tuesday, 26 November 2013
Woods location scouting
As we have decided that the "chase scene" within our film opening is going to be within a woods, my group and I felt that it would be good to get an idea of what all the woods in our neighborhoods looked like so that we have a variety of locations to choose from, creating the best final piece that we can produce, when we start filming.
Below shows a video that I took at my local woods, explaining the good and bad aspects of this location:

 In the video, I stated that the following were good aspects of this specific location:
Below shows a video that I took at my local woods, explaining the good and bad aspects of this location:
In the video, I stated that the following were good aspects of this specific location:- long stretch of "pathway"
- within a wooded area
- not a busy area
- when dark, would have a good atmosphere for our film opening chase scene
Less desirable aspects of this location are:
- near a motor way so very noisy
- quite muddy
This is one of the possible locations I have researched, that we could use for our chase scene.
Friday, 22 November 2013
Practical Investigation of Wooded Area & Lighting of Garage
 I am investigating wooded area because the questionnaire's feedback suggested the audience wanted a death scene in a wooded area. So, I went to Frank's Park and took pictures:
 In the park there were many 'clearings' in the middle of a patch of green and this could easily be acsessed. So, we could kill our victim in one of the spaces because it is surrounded by trees and bushes so it would seem more secretive.

 There were many oddly shaped trees, including the biggest tree in the park. < This tree with its thick, spurted branches resembles the tree in 'Don't Let Him In' where the killer hung the victims' limbs from
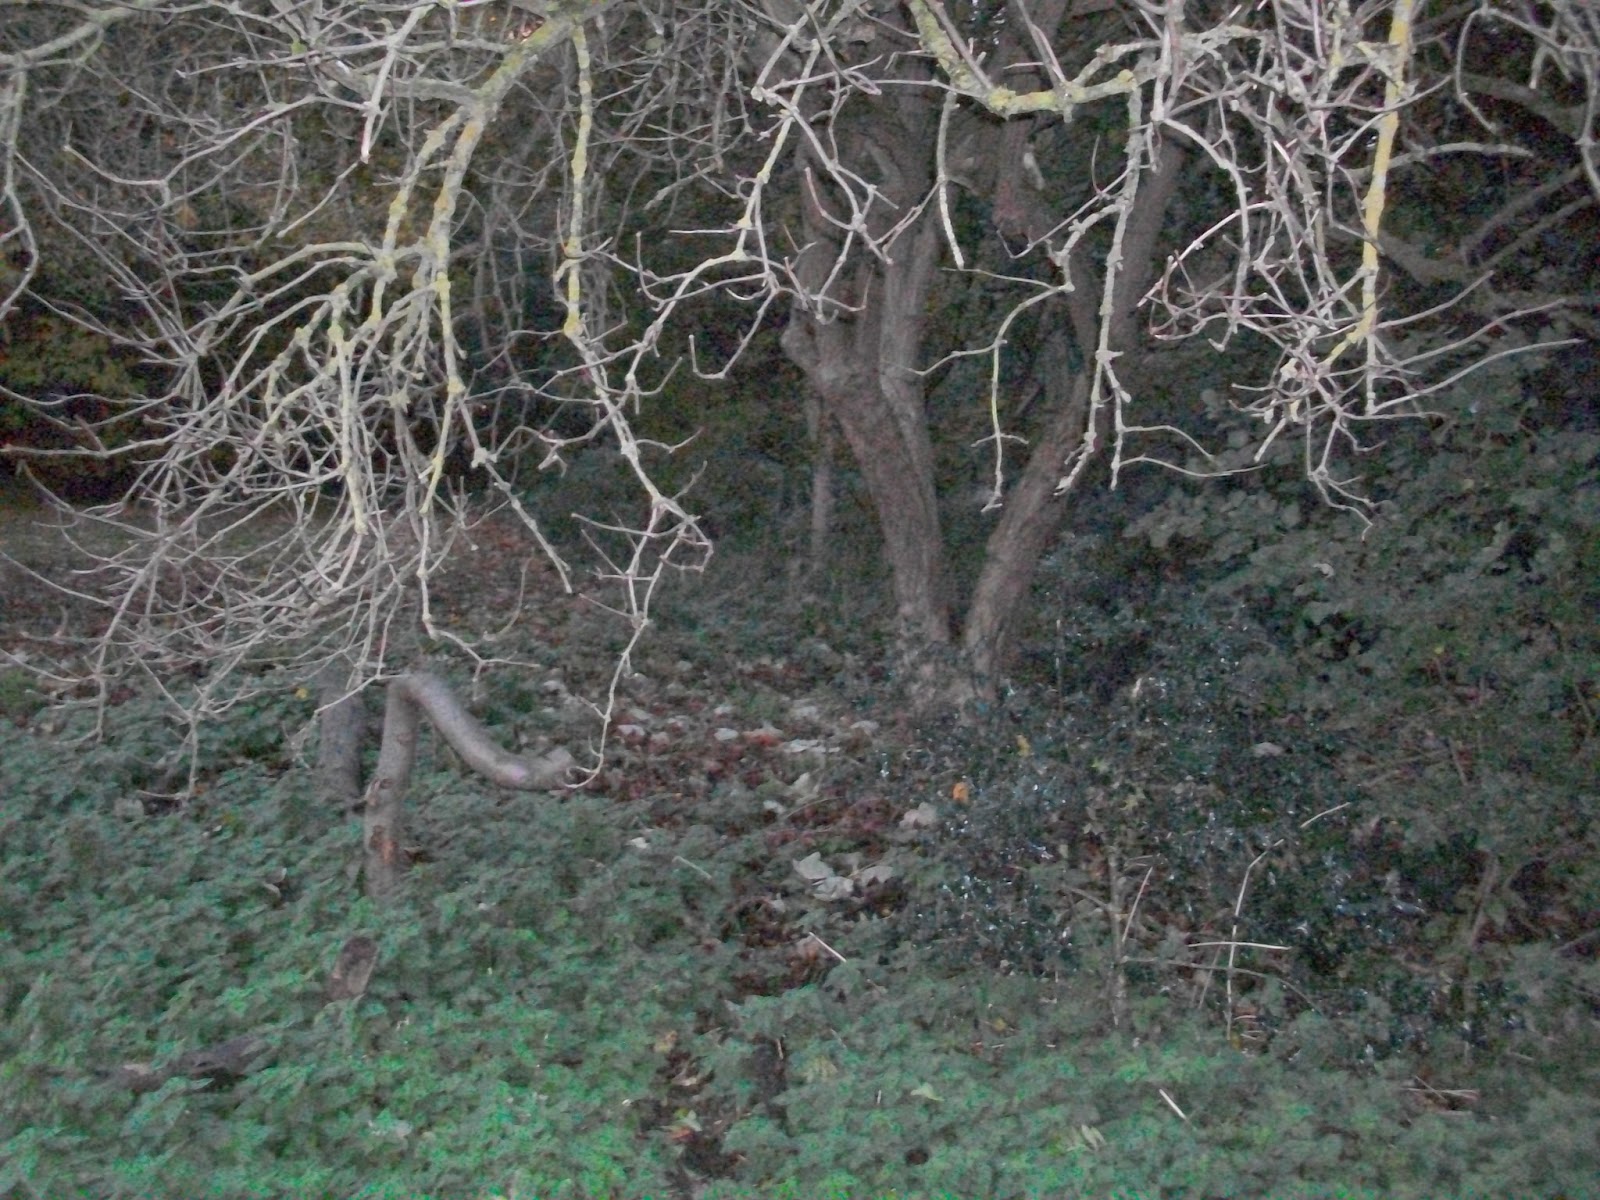


In the park, there are many pathways between large bushes and you cannot see much further because it becomes dark. This would be a very good place for when the victim is trying to run away from the killer at the beginning of our opening because it incorporates the wooded area suggestion from the questionnaire and ties in with the slasher and horror conventions of the death scene taking place in a dark and secluded area.


There are 2 light bulbs in the garage so I took a picture of them turned on individually, and then together. The second one is brighter than the first and if we were to put the desk underneath this one, the light would be able to illuminate the diary and the killer well, unlike the first light (we would bring additional lighting for filming). The first light is dimmer than the second however low key lighting is a very common convention in slasher films as it prevents the victim from seeing where the killer is - scaring the audience more as they do not know when they will attack.

 Both the lights on together illuminates the entire garage and you can see everything clearly. However, high key lighting is not a typical slasher convention and also, it would not terrify the audience.

I changed the settings of my camera so the lighting was more enhanced. This illuminates the room very well, even the dimmest light bulb appears to be very bright. This light would make the killer's actions very visible to the audience however high key lighting is not a slasher convention so this would not be appropriate for our final project.

In conclusion, the lights which are already there would be good for the final project because a single light bulb (not both on at the same time - too bright) produces low key lighting and darkness is a typical slasher convention. We would place the desk under the dimmest bulb so the garage would be in low key lighting so to make the scene more intense.
Also, Frank's Park would be a good place to film a death scene because of the pathways leading to the unknown - this scaring the audience as they are not in the know and would wonder where the victim will end up. Also, the strangely shaped trees would create an eerie and slightly disturbing atmosphere which is what we are aiming for, as this is a slasher.
Sunday, 17 November 2013
The Killer's Written Diary Investigation
After creating our story board, I realised that we would have to rethink our diary idea taking the initial idea of it being a story book that the killer keeps and puts photos into, changing it into an actual written diary.
 To make this written diary, I got a plain lined note book at the pound store.

I wanted to make the pages look older and more used, so I coloured them with tea staining. This also made them look wrinkled and used, which is what we want.
 To the front cover, I thought that it would be an idea to make it look as if it is skin, and the killer has made this diary out of his victims skin. I covered the the original cover in tissue paper mache in layers, sewing the sides to make it look like the killer put the diary together himself. I used tissue with a texture to make it look realistically like dried skin. Once it had dried, I painted the textured cover in skin coloured tones.

I then decided to experiment with the writing type within the diary. I thought that it would be a good idea to make it look like the killer uses blood to write with, instead of ink, so I got a red ink, and started to write a few pages of possible entries that the killer would have written, putting myself in his shoes. Below shows the result of this investigation:


The only problem with these entries is that on camera, the "blood" looks too pink to look realistically like blood. This being a problem however, I liked the rough, hard to read writing that I felt that the killer would have, showing clearly where he was feeling passionate and emotional about what he was writing, having it in large, scratchy typography with droplets littering the page, adding the effect of making it look more realistic, old fashioned and creepy.
From this first trial, I decided to develop the design of it further, making the outside look more realistically like skin, and the blood ink look more like blood, deepening the colour.
 I started off with deepening the colouring of the tea stain on the pages, making the whole book look tea stained in irregular shapes and tones.

I then slightly adjusted the colour of the covering to make it look more leathery and dried. Covering the outside in liquid latex was an idea to make it look look more like skin. Peeling sections back and creating texture and blistering. Below shows the result of this effect on the outside of the book:

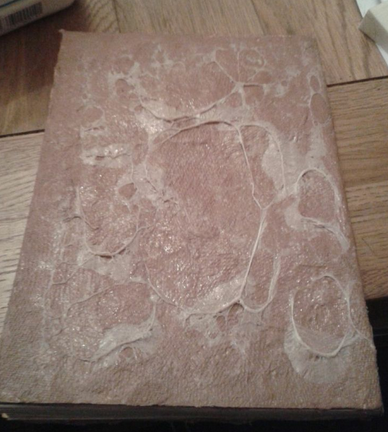
This shows the front of the book cover This shows the back of the book cover


The next step in making this look better was to deepen the colour of the "blood" writing.

 To do this, I mixed the red ink with some black ink, using a quill to write the entries. As you can see from the photos to the left and right, this time, the product was much better, and on camera, it looks more realistically like blood.

Now that this is finished, we can use this prop in our film opening. It will be used as the killers diary and will appear within the opening when the killer writes another entry about the murder he has just undertaken. The final product is shown below:

 To make this written diary, I got a plain lined note book at the pound store.
I wanted to make the pages look older and more used, so I coloured them with tea staining. This also made them look wrinkled and used, which is what we want.
 To the front cover, I thought that it would be an idea to make it look as if it is skin, and the killer has made this diary out of his victims skin. I covered the the original cover in tissue paper mache in layers, sewing the sides to make it look like the killer put the diary together himself. I used tissue with a texture to make it look realistically like dried skin. Once it had dried, I painted the textured cover in skin coloured tones.
I then decided to experiment with the writing type within the diary. I thought that it would be a good idea to make it look like the killer uses blood to write with, instead of ink, so I got a red ink, and started to write a few pages of possible entries that the killer would have written, putting myself in his shoes. Below shows the result of this investigation:


The only problem with these entries is that on camera, the "blood" looks too pink to look realistically like blood. This being a problem however, I liked the rough, hard to read writing that I felt that the killer would have, showing clearly where he was feeling passionate and emotional about what he was writing, having it in large, scratchy typography with droplets littering the page, adding the effect of making it look more realistic, old fashioned and creepy.
From this first trial, I decided to develop the design of it further, making the outside look more realistically like skin, and the blood ink look more like blood, deepening the colour.
I started off with deepening the colouring of the tea stain on the pages, making the whole book look tea stained in irregular shapes and tones.I then slightly adjusted the colour of the covering to make it look more leathery and dried. Covering the outside in liquid latex was an idea to make it look look more like skin. Peeling sections back and creating texture and blistering. Below shows the result of this effect on the outside of the book:
This shows the front of the book cover This shows the back of the book cover
The next step in making this look better was to deepen the colour of the "blood" writing.
To do this, I mixed the red ink with some black ink, using a quill to write the entries. As you can see from the photos to the left and right, this time, the product was much better, and on camera, it looks more realistically like blood.Now that this is finished, we can use this prop in our film opening. It will be used as the killers diary and will appear within the opening when the killer writes another entry about the murder he has just undertaken. The final product is shown below:
Friday, 15 November 2013
Practical Investigation of Content in Killer's Diary


 I was trying to find some pictures of foetuses, especially ones from folklore such as devil or animal foetuses. Unfortunately, I was not able to find much however I came across sketchings from Leonardo Da Vinci of foetuses and pregnancy women.
 Looking at Da Vinci's work, it would be interesting if our killer was to draw pictures of pregnant women and their foetuses because this would emphasize his obsession and fascination with foetuses and pregnancies. The audience will see him as mysterious and obsessive but also memorable.
Here, I have taken pictures of what the killer's diary might look like with the pictures in and words circled in red pen - red = blood, danger, lust, and (ironically for this) love.


Overall, for our final project, we will make the killer's diary look messy with random words circled describing the killer, victims, and the murders. For the opening, these words can be focused on to show the audience of the killer's obsession; obsessive killer's being a slasher convention in order to frighten the audience more.
Subscribe to:
Posts (Atom)